How might we design a more efficient system?
Datasaur, an artificial intelligence (AI) company makes tools for data labelers. They approached us to design a web-based platform for annotators to complete all audio labeling tasks in one place.
Currently, no single tool on the market does this.

CLIENT
Datasaur
DURATION
3 Weeks in 2019
TOOLS
- Figma
- Adobe Creative Suite
- Whiteboard
- Pen and paper
TEAM AND ROLES
I worked on this project with two other UX designers, Beth Bledsoe and Thomas Truong.
We worked collaboratively on most major aspects of this project. I was heavily focused on research and strategy, and took on the task of moving our whiteboard sketches to high-fidelity mockups.
METHODS
- Strategy
- Market Research
- Competitive Analysis
- Competitive Usability Testing
- Interviews
- User Flows
- System Map
- Design Studio
- Wireframes & Prototype
- Wireframe Usability Testing
- Annotations
Neither of my teammates nor I had previous working experience with artificial intelligence tools, so we spent the first few days doing extensive market research and playing around with Datasaur’s existing text labeling prototype.
We also lined up interviews with machine learning and artificial intelligence experts.
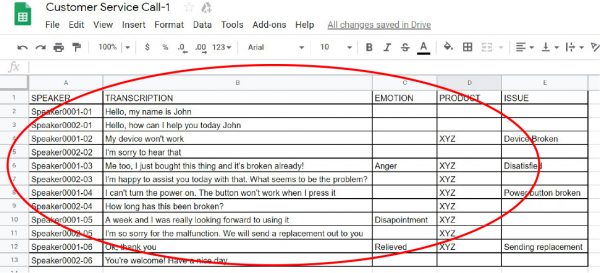
We learned that it isn’t enough to simply give a computer data. That data needs to be labeled in way that machine algorithms can read and process. In the case of audio, depending on the model it isn’t enough to simply transcribe the words in a particular snippet. Label sets might also need to be created that identify the speakers, the emotion, background noises, and subject matter.
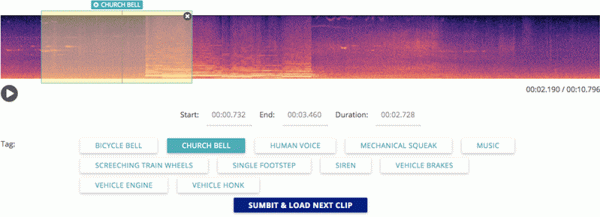
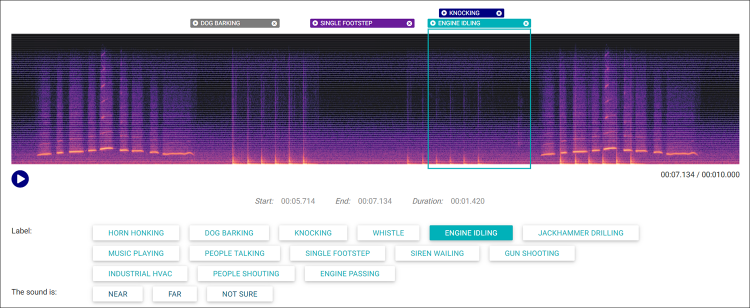
We conducted usability testing on an audio labeling prototype developed by Stefanie Mikloska from the University of Waterloo.
We quickly saw trends in which features users found useful, and which part of the process frustrated users.
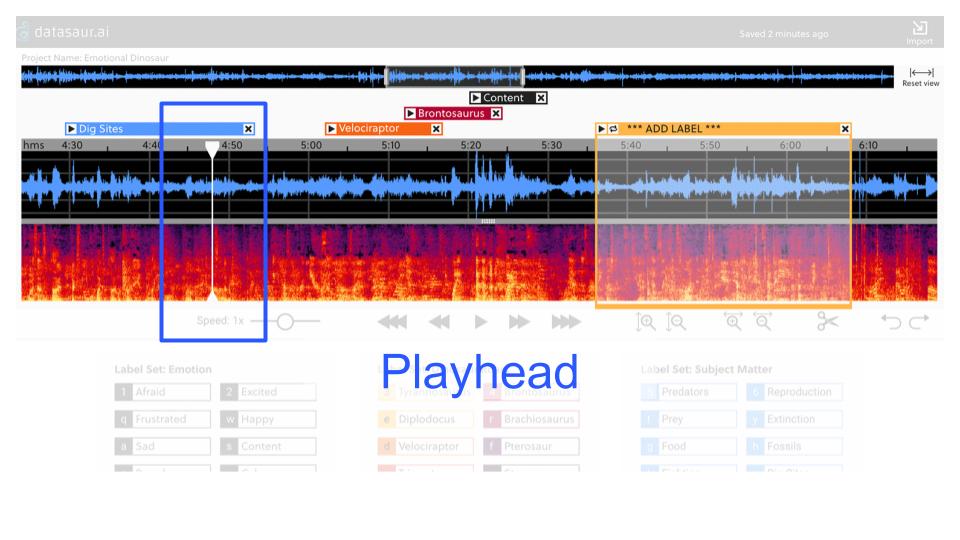
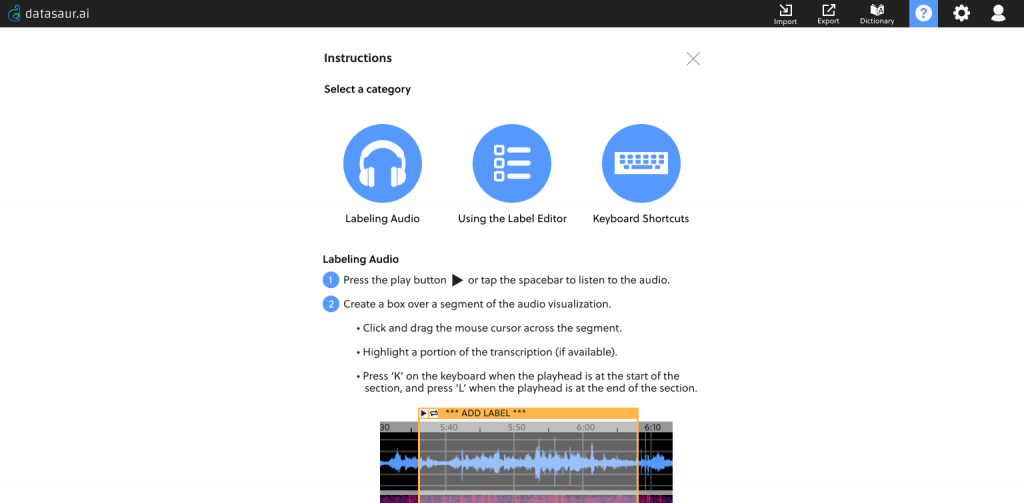
The first big issue for novice users was not knowing how to start selecting and labeling audio, even though the prototype opens with an instructions screen. The second issue involved playing the audio. Users wanted more control over the location of the playhead, but were limited to a simple play button. If users needed to review a specific section of audio, they had to wait for the audio file to loop through.
We were keen on learning about labeling from the perspective of people who prep data for a living, but even with placing multiple ads and reaching out to our networks, we initially ran into trouble finding experienced annotators as most of this work is done overseas. That’s why we our initial research started with novice annotators.
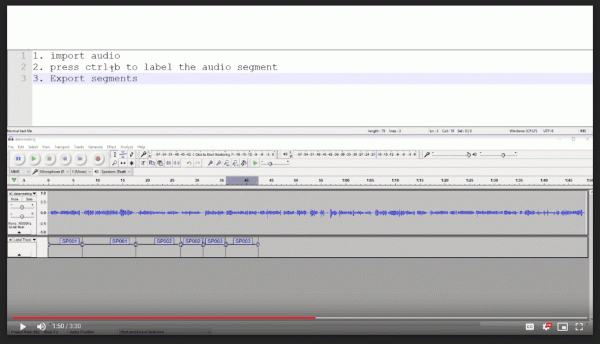
Thankfully, Datasaur CEO Ivan Lee was able to connect us with Prosa, a company in Indonesia that offers text and speech labeling services. They were able to share the various tasks involved in labeling audio, and made a video showing their process step by step.
They emphasized importance of highly accurate labels. Transcription errors worsen the AI model, thus they spend considerable amount of time selecting the right segments and making sure that they are labeled correctly:
“If we process audio data with a duration of 40 seconds, we need at least 400 seconds to label its transcript. Although we need about 100 hours data to build a good model. It is an expensive task.”
To better understand the audio labeling process, we studied the steps in Prosa’s video and then completed the tasks ourselves multiple times. That experience, combined with our usability testing and interviews revealed a few pain points.
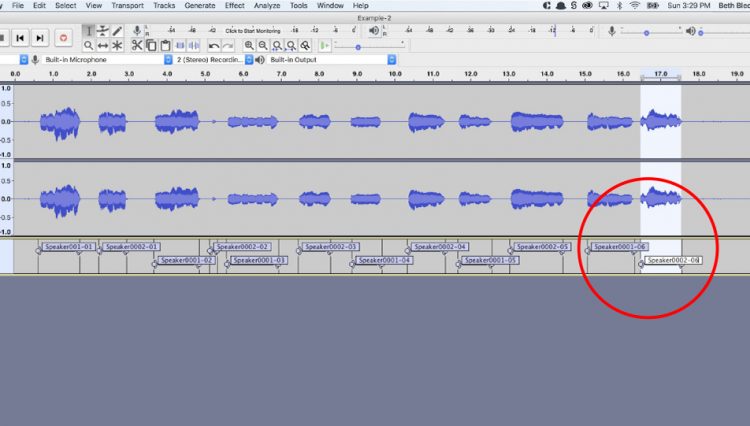
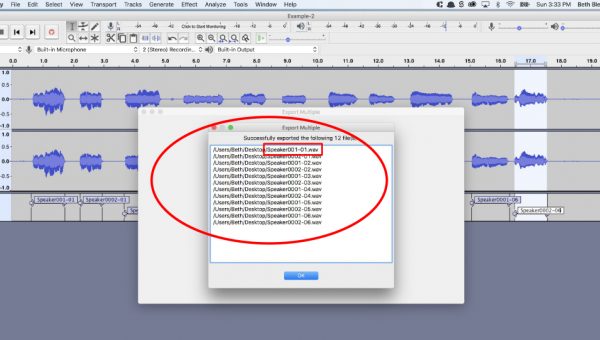
The audio is first listened to and labeled in Audacity.
- This tool has limited labeling capabilities, as it was not designed for doing transcriptions, and all labels, regardless of type, look the same.
- Each label must be manually typed, which slows the process down.
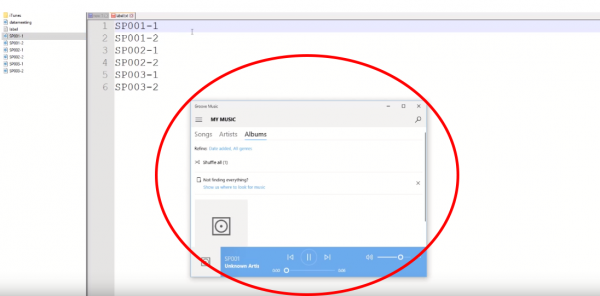
The audio clips are then exported as a batch to the computer.
- Exporting to an external tool increases risk of misplacing or losing the data.
- Typos can lead to incorrect labeling, which puts the artificial intelligence algorithm at risk of being fed incorrect information.
- Typos can lead to missing data segments.
Specifically, the tool must be designed for:
- Precision – Ability to select exact clips and avoid labeling errors
- Efficiency – Enable labelers to work quickly in a smooth workflow
- Learnability – The process need to be easy to pick up with minimal training

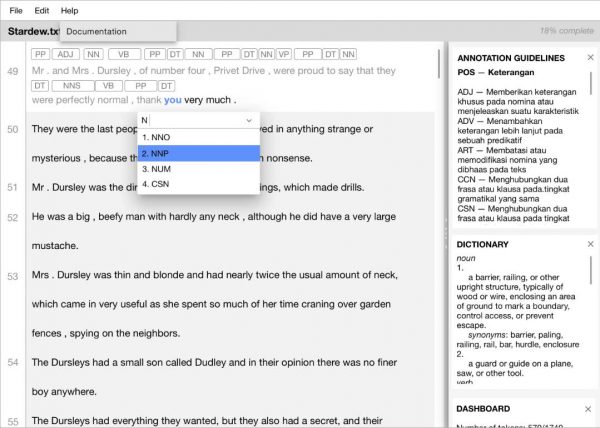
In our competitive analysis of 12 data labeling and audio applications we kept an eye out for the types of features that would aid audio annotators in their tasks. These are three of those programs:
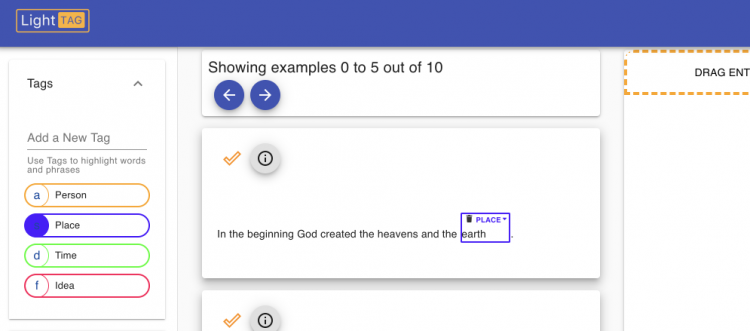
LightTag
- Annotators are quickly able to create labels.
- Each label has a keyboard shortcut, which aids in efficiency.
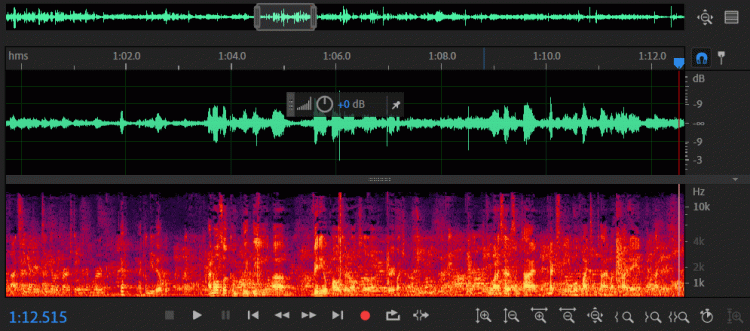
Adobe Audition
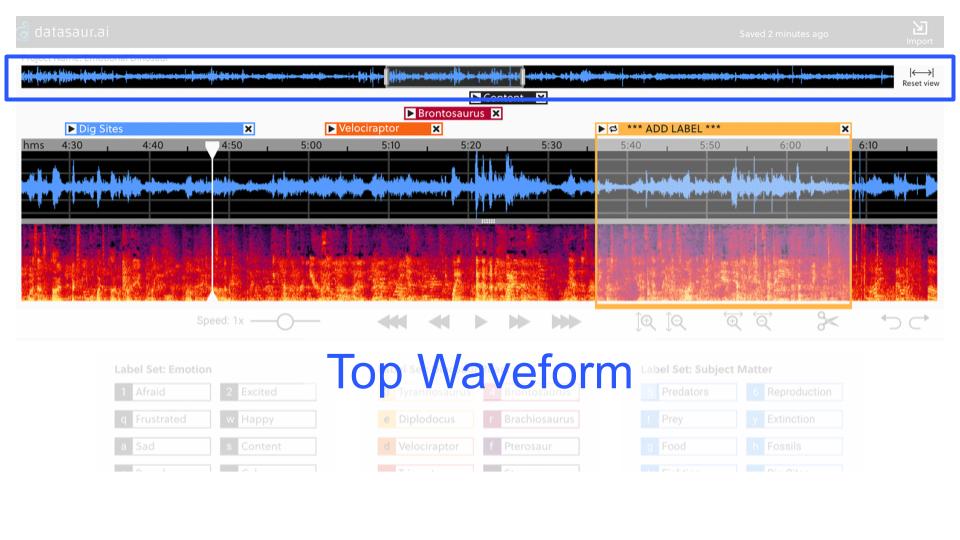
- The waveform at the top of the screen aids in navigation, and its highlighted selection has handles that can be used to set the zoom level of the main play screen.
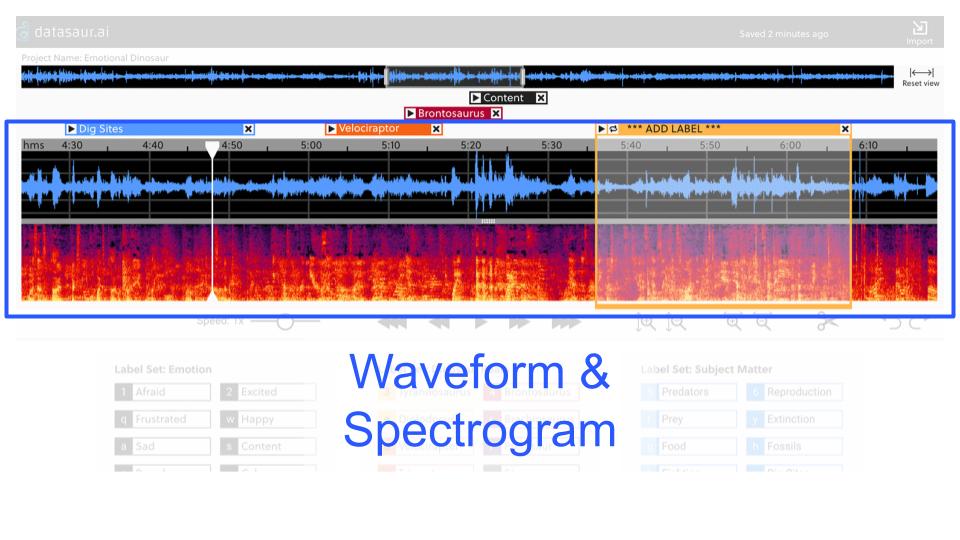
- Visual representations of audio in both waveform and spectrogram formats, and a toggle bar between the two views.
- Options to adjust the play speed and zoom level for increased audio selection precision.
After completing the competitive analysis, and usability testing of the CrowdCurio Audio Annotator, we had a meeting with our client to share our findings, and to discuss key product features.
We then did a design studio to explore what the main dashboard could look like. Everyone’s sketches featured a prominent visual representation of audio with label sets nearby.
After our client left, we incorporated elements from the paper sketches into a collaborative whiteboard sketch. We did a few iterations over the next few days, adding in elements from our required features list.
In a followup meeting with the CEO and the head engineer to discuss technical feasibility, most of the elements got the all clear, but movable elements such as the waveform/spectrogram divider and the widgets would likely need more fixed positions for the first production round.
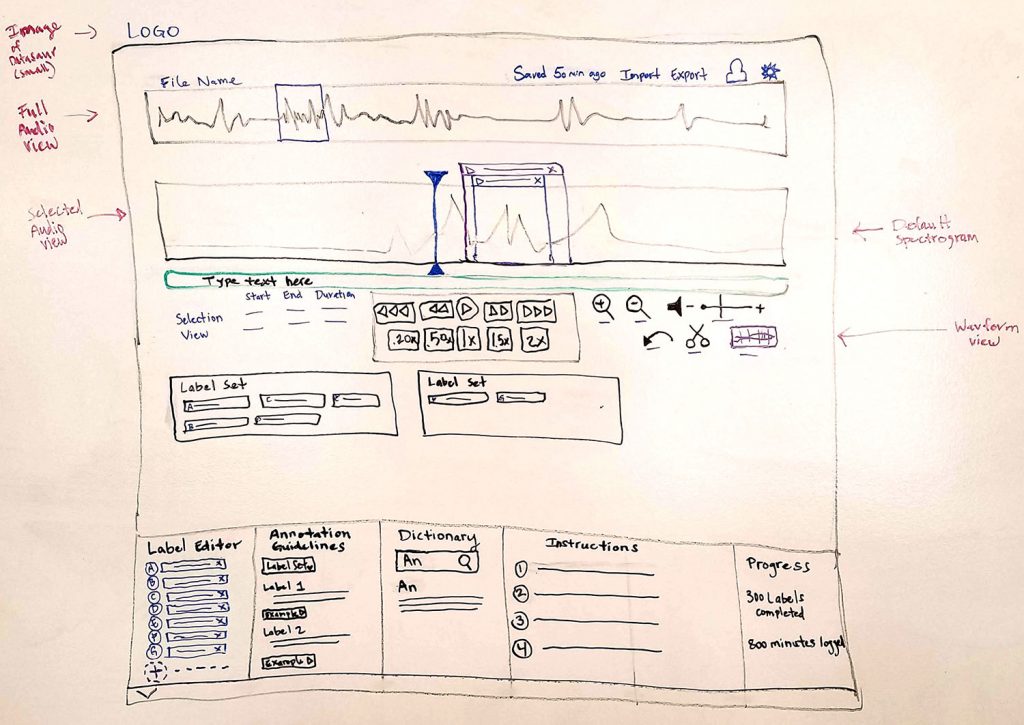
We did multiple rounds of usability testing, first using paper sketches, and at the end with a clickable prototype. We paid particular attention to where users were confused or stuck, and modified the designs accordingly. Some changes were quick to make, such as adding text to an icon. Others required more thought:
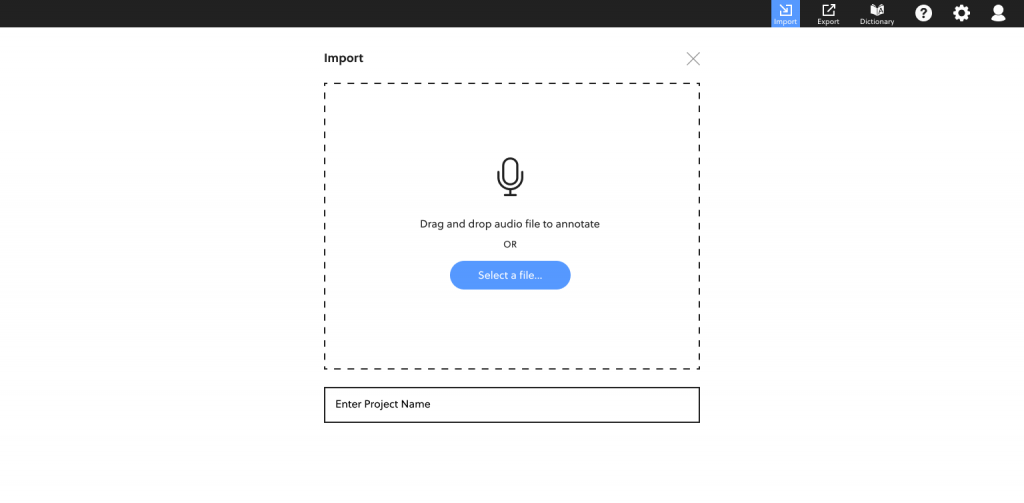
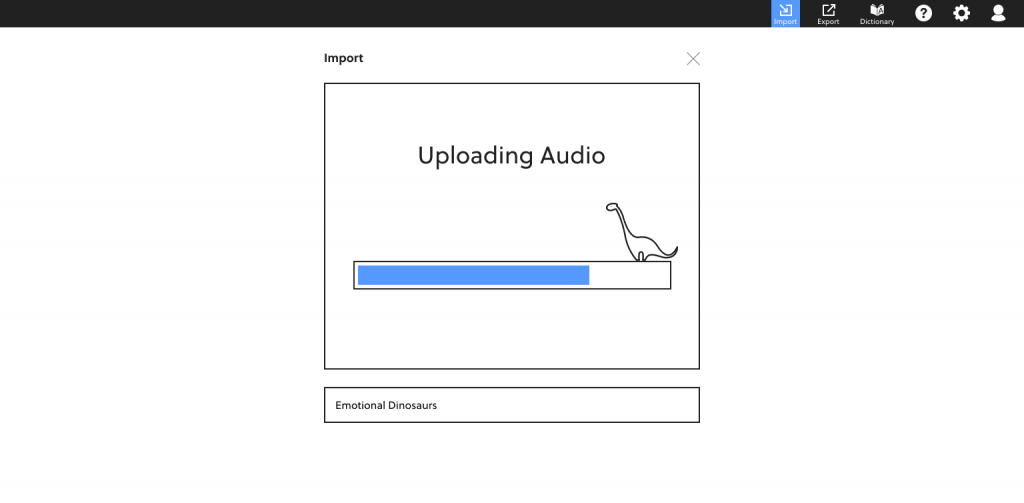
Import
The process begins at the import screen, designed solely for bringing in the audio and naming the project.
In the initial sketches and wireframes, the importing was done from the main labeling dashboard, but most users did not know to start the project by importing audio unless prompted to do so. Once we broke up the project setup process into separate screens, first time annotators had no trouble going through the first few steps.
Selecting Labels
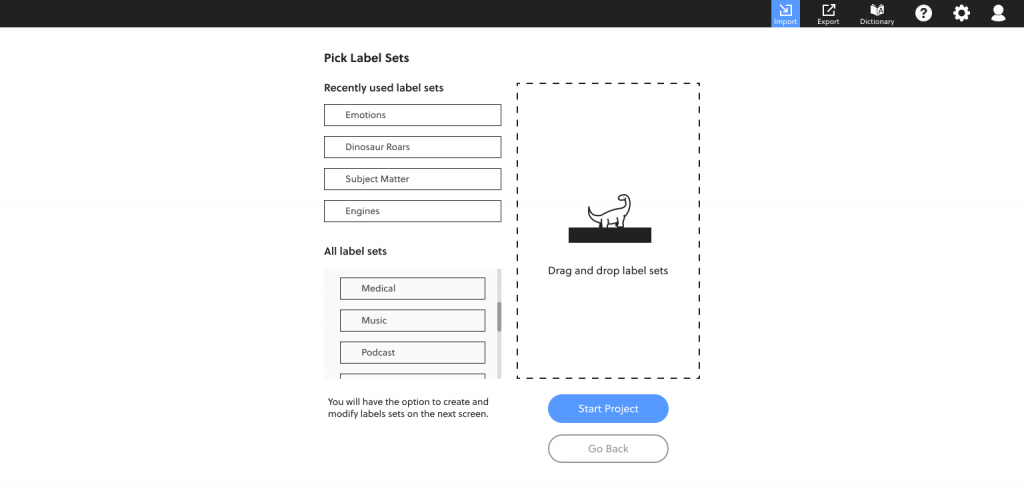
The final step of the starting a project is selecting label sets.
We extended the drag and drop design from the import screen to here.
Given that users will likely be working on audio files from a series, they will frequently need the same labels again and again. The last four label sets that were used are at the top of the page, with a scrolling list of all past label sets below.
Main Dashboard
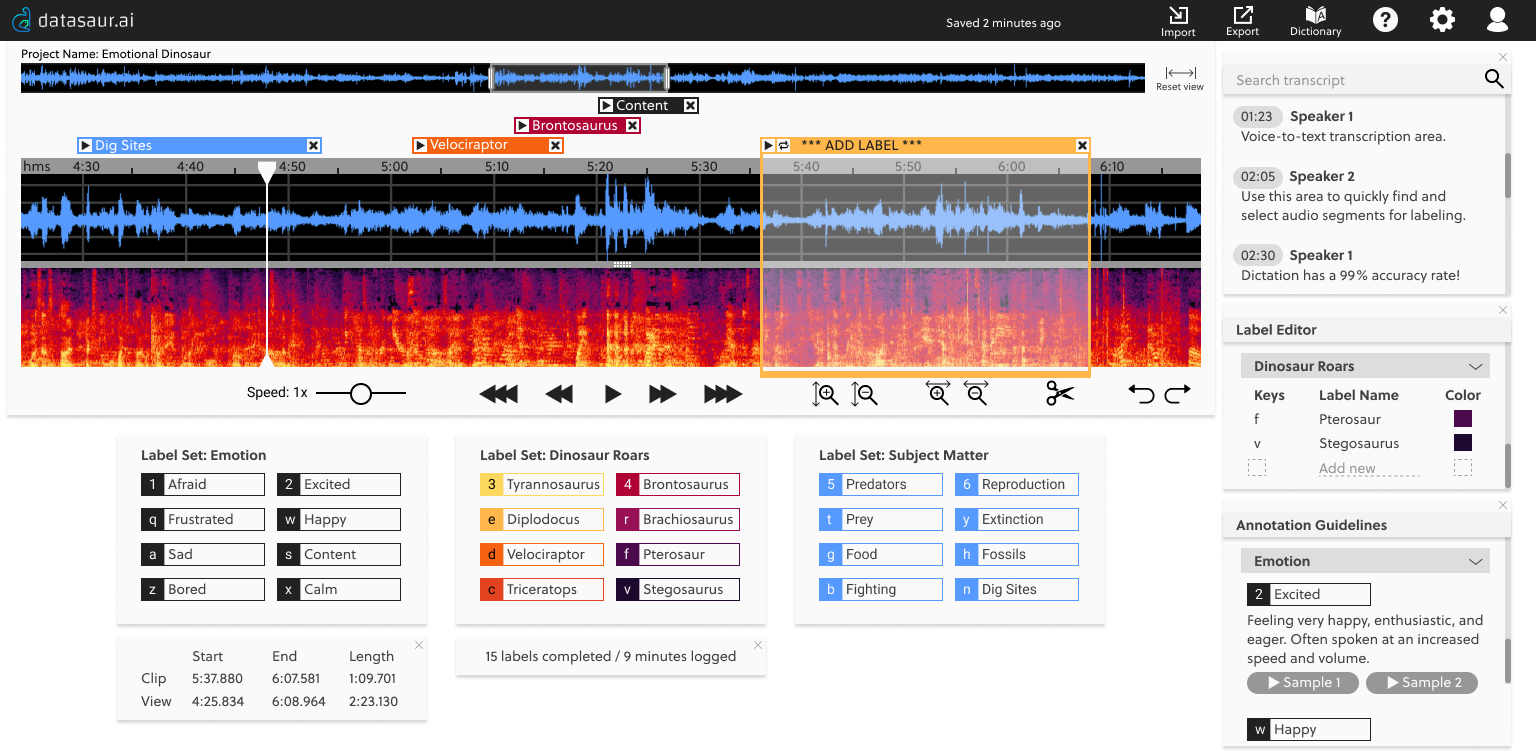
On this screen, the data labeler is able to select precise audio clips, assign the clips labels, make transcription adjustments, and create label sets and keyboard shortcuts.
Audio Visualizations
From secondary research, we learned that when data labelers have audio visualizations, they are able to produce high quality annotations and in less time than when there are no visualizations.
Same holds true for spectrograms (the lower region) over waveforms (the top region), but during usability testing, a few annotators had a hard time looking at the spectrogram. In this dashboard, the annotator can use either visualization, or toggle between the views.
We had our final handover meeting with our client one week after they officially launched. The CEO expressed eagerness at incorporating some of the features we created for the audio labeling tool into their existing text tool.
As of now, the audio tool is slated to be further developed next.

